Kamis, 23 Februari 2012
Kamis, 16 Februari 2012
Dapat PageRank #1 Di Google

Assalamualaikum wr wb wahai sobat sobat ku.hari ini saya sangat bahagia karena blog reknaon Dapat PageRank #1 Di google pagerank. Gak nyangka banget , kalau di lihat lihat blog reknaon masih terbilang formula karena saya baru belajar ngeblog selama 3 bulan lebih tapi sudah mendapatkan pagerank #1.
Cara Mengukur seberapa tingginya pagerank Blog anda Bisa di cek DISINI
Alamat Cek Page Rank Lainnya Ada DISINI dan Cara Buat Widget Page Rank sekalian cek page rank nya ada DISINI
Senin, 13 Februari 2012
Trik Mempercepat Modem CDMA Dan GSM
Di zaman sekarang yang serba mobile banyak produsen hardware serta provider internet memberi kemudahan mengakses internet dimana saja dan kapan saja. hehe, kayak iklan saja... Kebanyakan dari mereka memanfaatkan akses internet melalui koneksi sistem wireless atau gelombang radio sebagai penghubung antara user pengguna internet dengan provider jasa internet menggunakan modem kartu, misalnya modem CDMA dan GSM dengan akses 3G dan HSDPA.
Meskipun mobile dan banyaknya jenis modem yang ditawarkan dipasaran dengan teknologi terkini, masih ada juga pengguna yang merasakan lambatnya koneksi internet. Hal ini banyak faktor yang mempengaruhi salah satunya media koneksi sistem wireless, jaminan bandwidth yang tersedia, juga banyaknya pengguna serta faktor geografis atau lokasi pengguna terhadap pusat koneksi dan yang kali ini saya akan bahas merupakan salah satu faktor juga yang membuat koneksi internet sobat lamban alias lemot.
Langsung saja tanpa panjang lebar, dimana saya akan berbagi tips Cara Meningkatkan Kecepatan Internet Modem CDMA dan GSM agar surfing didunia maya makin asik.
- Menu Start pilih RUN, ketikkan gpedit.msc kemudian enter
- Selanjutnya akan muncul kotak dialog Group Policy
- Pilih Computer Configuration - Administrative Templates - Network - QoS Packet Scheduler
- Klik dua kali Limit reservable bandwidth selanjutnya pilih enabled
- Pada Bandwidth limit (%) ubah angkanya menjadi 0 kemudian OK dan tutup jendela Group Policy


Langkah selanjutnya copy-kan setting registry berikut kedalam notepad :
Windows Registry Editor Version 5.00
[HKEY_LOCAL_MACHINE\SYSTEM\CurrentControlSet\Services\Dnscache\Parameters
"CacheHashTableBucketSize"=dword:00000001
"CacheHashTableSize"=dword:00000180
"MaxCacheEntryTtlLimit"=dword:0000fa00
"MaxSOACacheEntryTtlLimit"=dword:0000012d
[HKEY_LOCAL_MACHINE\SYSTEM\CurrentControlSet\Services\Tcpip\Parameters\Interfaces]
"MTU"=dword:00001500
[HKEY_USERS\.DEFAULT\Software\Microsoft\Windows\CurrentVersion\Internet]
"MaxConnectionsPerServer"=dword:00000010
"MaxConnectionsPer1_0Server"=dword:00000010
[HKEY_CURRENT_USER\Software\Microsoft\Windows\CurrentVersion\Internet]
"MaxConnectionsPerServer"=dword:00000010
"MaxConnectionsPer1_0Server"=dword:00000010
[HKEY_LOCAL_MACHINE\SYSTEM\CurrentControlSet\Services\Tcpip\Parameters]
"DefaultTTL"=dword:00000080
"EnablePMTUBHDetect"=dword:00000000
"EnablePMTUDiscovery"=dword:00000001
"GlobalMaxTcpWindowSize"=dword:00007fff
"TcpMaxDupAcks"=dword:00000002
"SackOpts"=dword:00000001
"TcpWindowSize"=dword:00007fff
"Tcp1323Opts"=dword:00000001
[HKEY_LOCAL_MACHINE\SYSTEM\CurrentControlSet\Services\Tcpip\ServiceProvider]
"HostsPriority"=dword:00000001
"LocalPriority"=dword:00000001
"DnsPriority"=dword:00000001
"NetbtPriority"=dword:00000001
[HKEY_LOCAL_MACHINE\SYSTEM\CurrentControlSet\Services\Class\NetTrans]
"MaxMTU"="1500"
[HKEY_LOCAL_MACHINE\SYSTEM\CurrentControlSet\Services\VxD\MSTCP]
"DefaultRcvWindow"="3216"
[HKEY_LOCAL_MACHINE\SYSTEM\CurrentControlSet\Services\VxD\NWLink\Ndi\params\cachesize]
@="64"
[HKEY_LOCAL_MACHINE\SYSTEM\CurrentControlSet\Services\VxD\NWLink\Ndi\params\maxconnect]
"min"="2"
"max"="128"
Trik Mempercepat Modem CDMA Dan GSM[HKEY_LOCAL_MACHINE\SYSTEM\CurrentControlSet\Services\Dnscache\Parameters
"CacheHashTableBucketSize"=dword:00000001
"CacheHashTableSize"=dword:00000180
"MaxCacheEntryTtlLimit"=dword:0000fa00
"MaxSOACacheEntryTtlLimit"=dword:0000012d
[HKEY_LOCAL_MACHINE\SYSTEM\CurrentControlSet\Services\Tcpip\Parameters\Interfaces]
"MTU"=dword:00001500
[HKEY_USERS\.DEFAULT\Software\Microsoft\Windows\CurrentVersion\Internet]
"MaxConnectionsPerServer"=dword:00000010
"MaxConnectionsPer1_0Server"=dword:00000010
[HKEY_CURRENT_USER\Software\Microsoft\Windows\CurrentVersion\Internet]
"MaxConnectionsPerServer"=dword:00000010
"MaxConnectionsPer1_0Server"=dword:00000010
[HKEY_LOCAL_MACHINE\SYSTEM\CurrentControlSet\Services\Tcpip\Parameters]
"DefaultTTL"=dword:00000080
"EnablePMTUBHDetect"=dword:00000000
"EnablePMTUDiscovery"=dword:00000001
"GlobalMaxTcpWindowSize"=dword:00007fff
"TcpMaxDupAcks"=dword:00000002
"SackOpts"=dword:00000001
"TcpWindowSize"=dword:00007fff
"Tcp1323Opts"=dword:00000001
[HKEY_LOCAL_MACHINE\SYSTEM\CurrentControlSet\Services\Tcpip\ServiceProvider]
"HostsPriority"=dword:00000001
"LocalPriority"=dword:00000001
"DnsPriority"=dword:00000001
"NetbtPriority"=dword:00000001
[HKEY_LOCAL_MACHINE\SYSTEM\CurrentControlSet\Services\Class\NetTrans]
"MaxMTU"="1500"
[HKEY_LOCAL_MACHINE\SYSTEM\CurrentControlSet\Services\VxD\MSTCP]
"DefaultRcvWindow"="3216"
[HKEY_LOCAL_MACHINE\SYSTEM\CurrentControlSet\Services\VxD\NWLink\Ndi\params\cachesize]
@="64"
[HKEY_LOCAL_MACHINE\SYSTEM\CurrentControlSet\Services\VxD\NWLink\Ndi\params\maxconnect]
"min"="2"
"max"="128"
selanjutnya simpan dengan nama tweakconnection.reg atau nama apa saja kemudian klik dua kali dan OK atau sobat bisa mendownload file tweakconnection.reg yang sudah jadi disini.
Restart komputer/laptop sobat untuk merasakan bedanya. Sampai disini Insya Allah koneksi internet sobat akan terasa lebih cepat. semoga berhasil.
Trik Mempercepat Modem CDMA Dan GSM
Sumber : http://cuap-cuapz.blogspot.com/2012/01/tips-mempercepat-modem-cdma-dan-gsm.html
Trik Mempercepat Modem CDMA Dan GSM
Trik Mempercepat Modem CDMA Dan GSM
Fungsi Rahasia Tombol Shift
- Shift+del: menghapus file dan folder secara permanen tanpa menyimpan di Recycle Bin.
- Shift+Ctrl+T ditekan maka akan membuka halaman yang tadi sudah ditutup (di browser).
- Shift +Tab maka Tab-nya mundur ke belakang, khususnya ketika mengetik di Microsoft Word.
- Shift bisa membuat user masuk ke mode hibernate, namun feature hibernate harus di-enable dulu di power option.
- Shift + F3 untuk membuat huruf uppercase atau lowercase atau huruf besar hanya untuk huruf yang di awal ketika mengetik dokumen.
- Shift+ ctrl+esc bisa membuat komputer menjadi responding lagi ketika sesaat hang/error.
- Tombol Shift juga berfungsi untuk menampilkan menu stickykeys, yang berguna untuk memudahkan untuk mengkombinasikan 2 tombol atau lebih. Hal ini memudahkan Anda untuk menjalankan perintah yang diinginkan tanpa memencet tombol sebelumnya.
- Shift ditekan ketika proses booting: mempercepat proses booting.
- Shift ditekan ketika menancapkan flashdisk ke komputer: mencegah jalannya autorun virus pada flashdisk.
- Shift ditekan ketika membuka file dari Windows Explorer: mengubah file-file otomatis menjadi tanpa nama.
- Shift ditekan ketika proses loading sebuah aplikasi: loading screen itu akan hilang.
- Dengan menekan Shift sambil mengklik “no” pada saat meng-copy file ke suatu folder dan muncul perintah yes, yes to all, no, cancel, maka otomatis akan menjalankan perintah no at all.
- Ketika sistem operasi Ubuntu hang cukup tahan Ctrl + Shift + prtscreen dan tekan bergantian key R E I S U B, maka Ubuntu akan reboot dengan sendirinya.
Fungsi Rahasia Tombol Shift
Fungsi Rahasia Tombol Shift
Fungsi Rahasia Tombol Shift
Fungsi Rahasia Tombol Shift
Sabtu, 11 Februari 2012
Cara Menginstal Windows Vista (Lengkap Dengan Gambar)
berikut langkah-langkah yang mudah dan lengkap cara menginstal windows vista :
1. Siapkan CD WINDOWS VISTA
2. Siapkan CD DRIVER MOTHERBOARD
3. Atur bios terlebih dahulu agar prioritas bootingnya dimulai dari CD(DVD)-ROM, caranya:
a. Masuk ke BIOS dengan menekan tombol Del, atau F1, atau juga F2.
Pilih menu Advanced Settings, kemudian carilah ‘Boot Priority’ atau yang sejenis.

b. ubah pengaturanya, agar CDROM jadi urutan yang pertama kemungkinan pilihan ini ada 2 jenis
* menu ‘First boot priority’, ‘Second boot priority’ dll: Aturlah ‘First boot priority’ ke ‘CDROM’ dengan menekan tombol PgDn/Pgup (Page Down/Up) atau +/-.
Atur juga ‘Second boot priority’nya ke HDD0/HDD1.
* Jika menunya ‘Boot priority’: atur ke ‘CDROM, C, A’ atau ‘CDROM, A,
C. dengan menekan tombol PgDn/Up.
gak usah di utak-atik biosnya. biarin aja bios diload masukin CD WINDOWSnya, lalu Restart komputer, trus tekan-tekan F8 atau F10 atau F11 (boleh dicoba satu-satu) nanti bakal muncul opsi boot selection. pilih aja yg ada 'bau' cd-nya. trus enter. selesai deh...ga pake repot-repot...

4. Tunggu beberapa saat sampai muncul tulisan "press any key to boot from CD" seperti tampilan Seperti gambar di bawah ini

WINDOWS VISATA SEDANG MEMUAT FILE

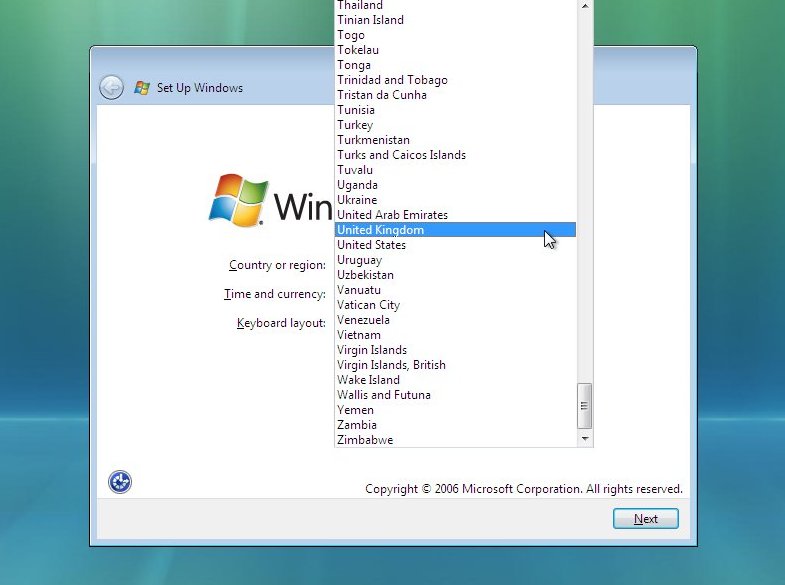
PILIH BAHASA
LALU TEKAN NEXT
SETINGAN DI BUAT DEFAULT AJA DI ATAS CUMAN CONTOH! TEKAN NEXT
TEKAN NEXT TUK MELANJUTKAN MENGINSTAL
KLIK KIRI DENGAN MOUSE 1X PADA INSTAL NOW

| PART 2 |
This section is the collecting information part. First you will need your Windows “Product Key”. This will be on the disk packaging provided with your CD’s/DVD’s. The product key will be 25 digits long and will contain letters and numbers.

CEKLIST PADA AUTOMATCALLY ACTIVATE WINDOWS WHEN I’M ONLINE DIHILANGKAN LALU TEKAN NEXT DENGAN MOUSE

MASUKKAN PRODUC KEY
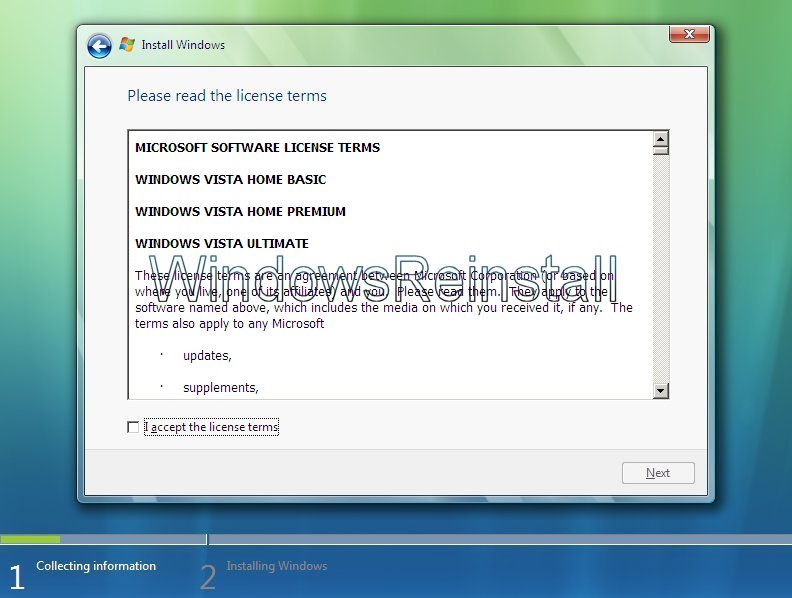
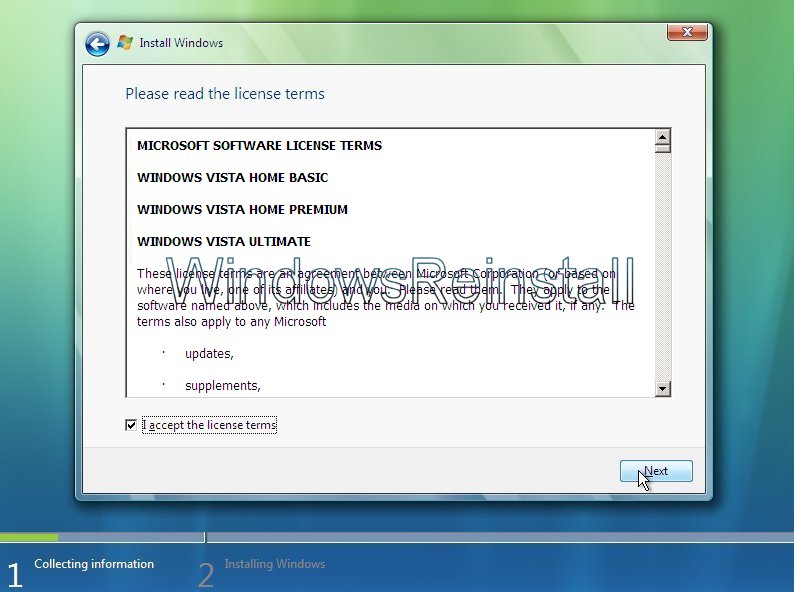
BERI CEKLIST DENGAN KLIK KIRI 1X DENGAN MOUSE DI I ACCEPT THE LINCES TERMS LALU KILIK NEXT
Now you will asked the type of installation you wish to do. Click on “Custom” to continue.
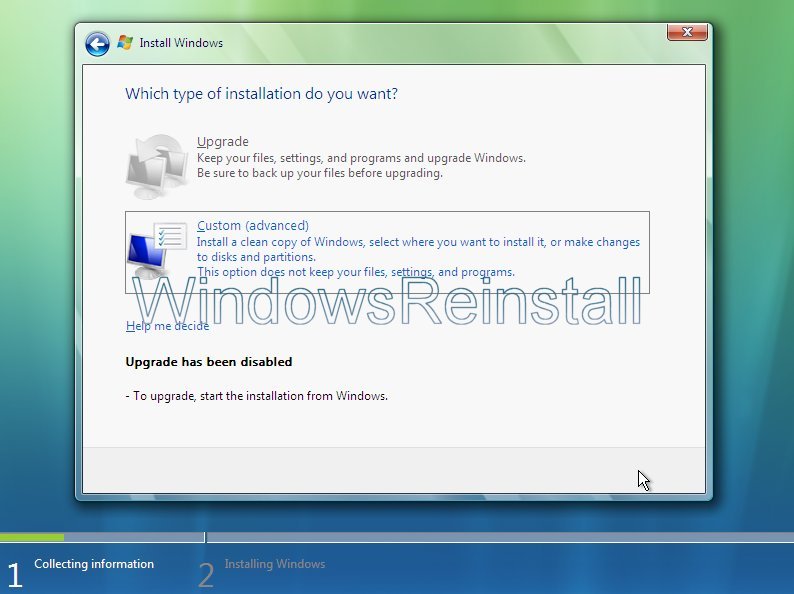
SETELAH TAMPIL GAMBAR DI ATAS PILIH COSTUM ADVANCED
To setup the harddrive, click on “NEW”

Select the amount of size you wish to use and click on “APPLY”.
It will take a few moments to apply the settings.
Once done, click on “FORMAT” to format the drive.
You will receive a warning, click “OK” to continue, as all info will be permanently deleted.

Windows is now formating the drive, this may take a few moments so be patient.
Once done click on “NEXT” to continue.
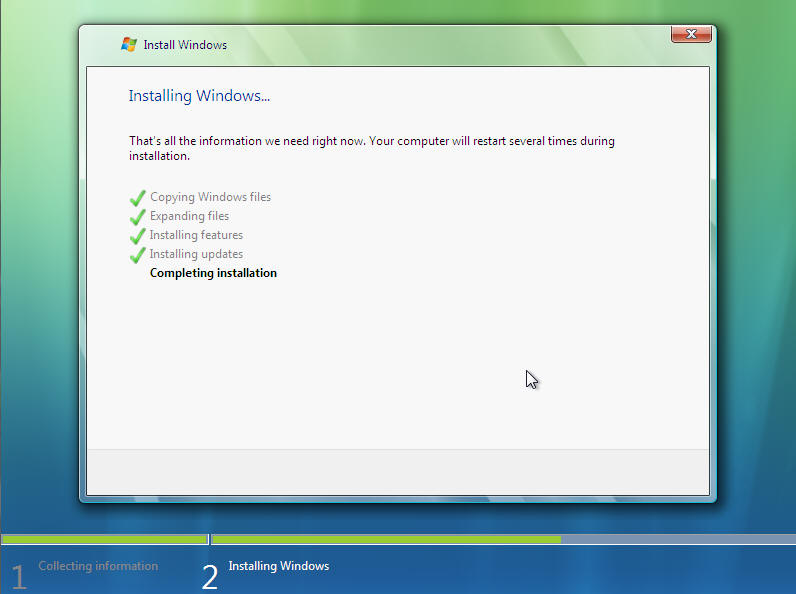
This section is for installing Windows, it will take sometime and does not require any input from you, so go make a cup of tea or watch TV as it may take up to an hour. Make sure there are no disks in your floppy drive, as the computer will reboot a few times during this process.
Windows now copies files:
Windows expands the files:

Windows is installing features:
Windows is installing updates:

Windows is doing a restart: It will do this automatically if you are not about, otherwise you can click “Restart Now” to speedthings up slightly.
The computer reboots:

If you get this message then you have left the a floppy disk in the floppy drive or your harddrive is not in the BIOS boot sequence correctly. Remove disk or fix BIOS then press “Any Key” to continue.

You may also get this message “Press any key to boot from CD or DVD..”, do not press and key and allow this to pass.
Windows continues Loading:

Windows is now booting for the first time, don’t be fooled there could still be a few reboots and quite a bit of installing to go.
Windows continues to install:

Windows does more updating and installing:
Windows reboots a few more times:
and then finally:

Something to do.
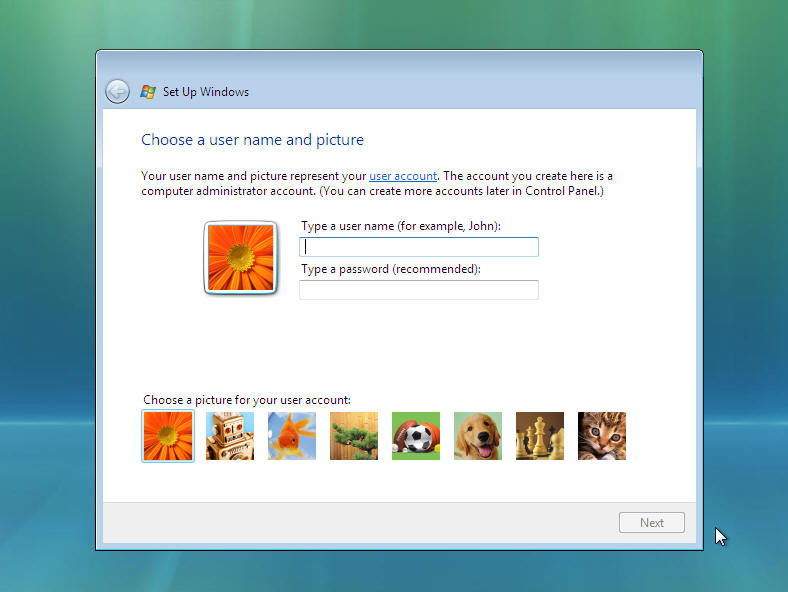
Next Input your Username for the computers Administrator account. Then Click on Password.
Now input your password (One you will remember) and then retype the password to confirm. Also type in a password hint that would help you remember it just in case. You may also change the default local login image by clicking on a different picture.
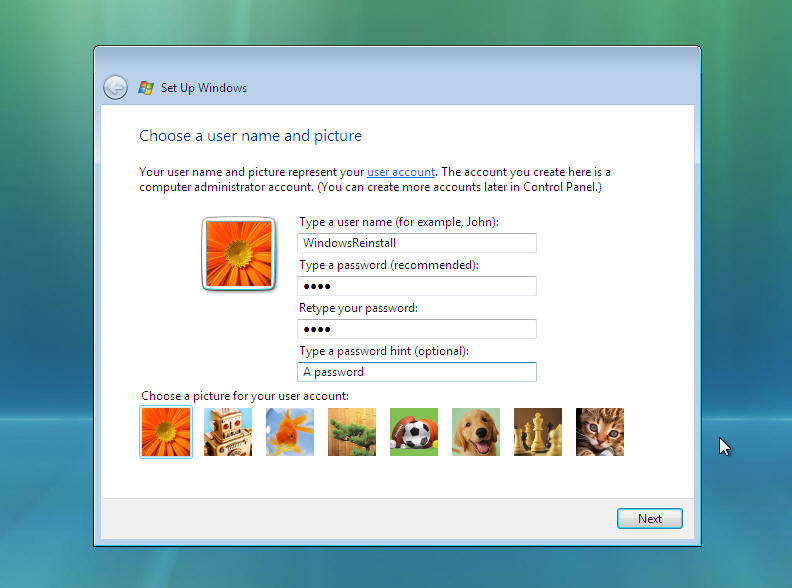
If you change the image it will change as per below. Once done click “NEXT” to continue.

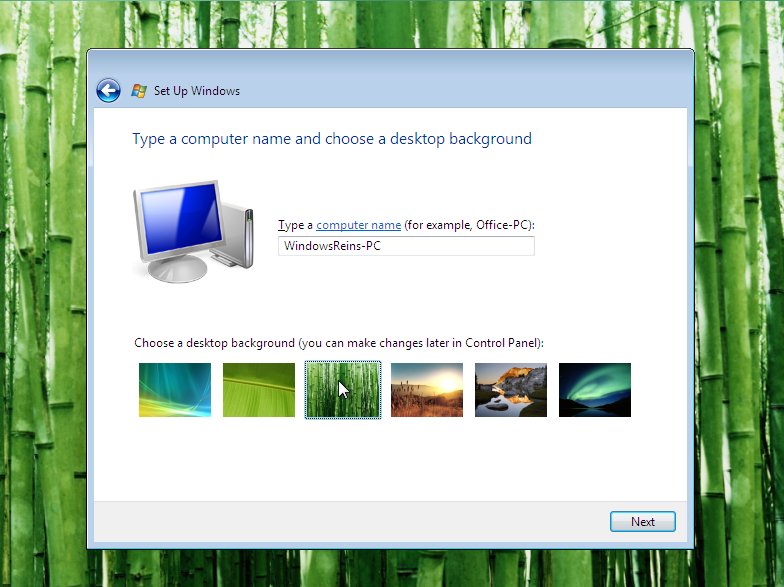
Now choose a computer name (Mainly used for ID on a network), and select a different background image if you wish.
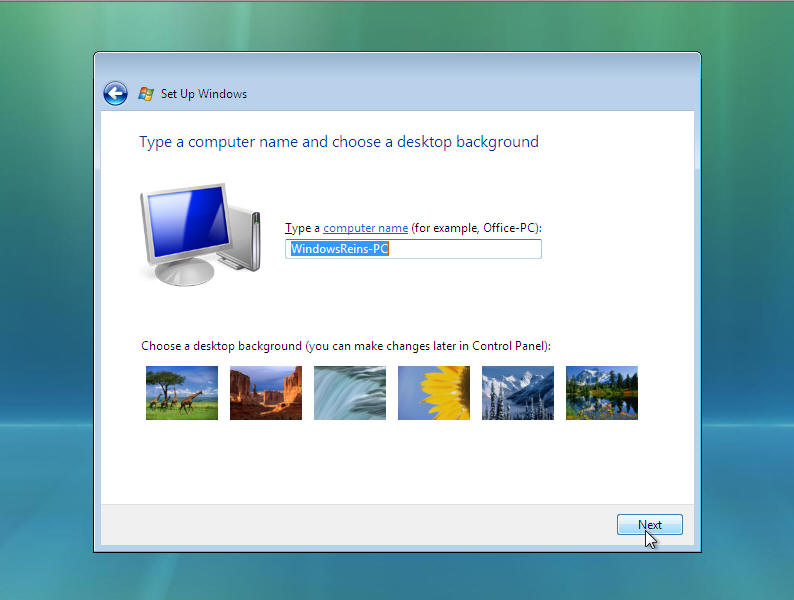
If you change the background it will change as per below. Click “NEXT” to continue.
Next you need to check the time zone is correct and also the time and date. Time and date in from the BIOS, but “Time Zone” needs to be set, it will defaulted to the most common language location used by your default language as set earlier. Click the “Down arrow” at the end of the box.
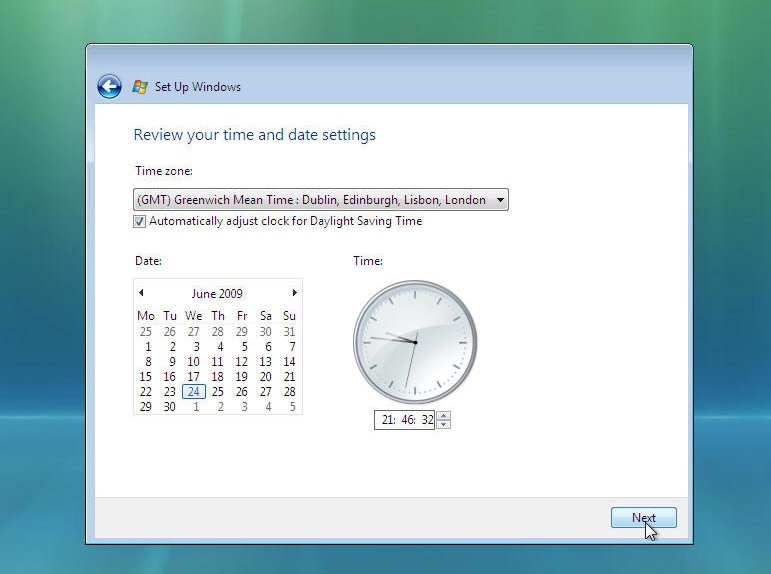
Now select your “Time Zone”. Once you are happy with your selection click on “NEXT” to continue
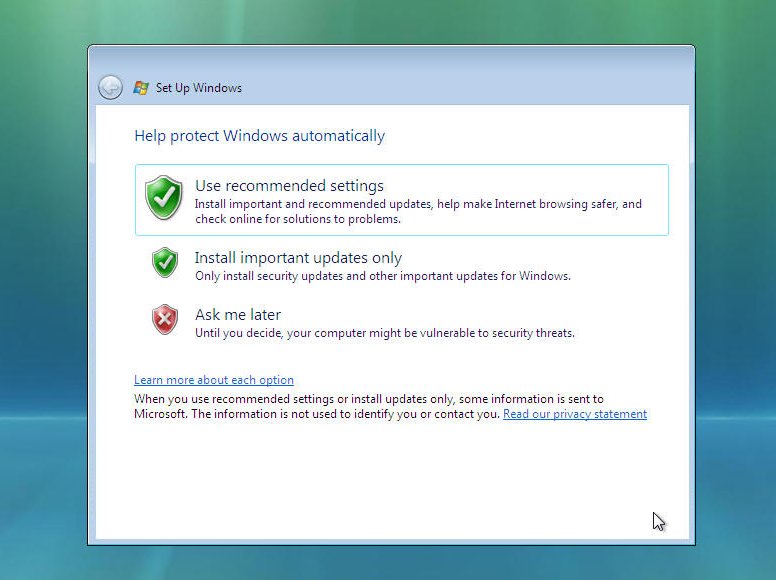
Now select your Windows protection method. We recommend the top option “Use Recommended settings”, click on your selection to continue.
That is all the information gathered that is needed, Windows Install will thank you, click on “START” to continue….
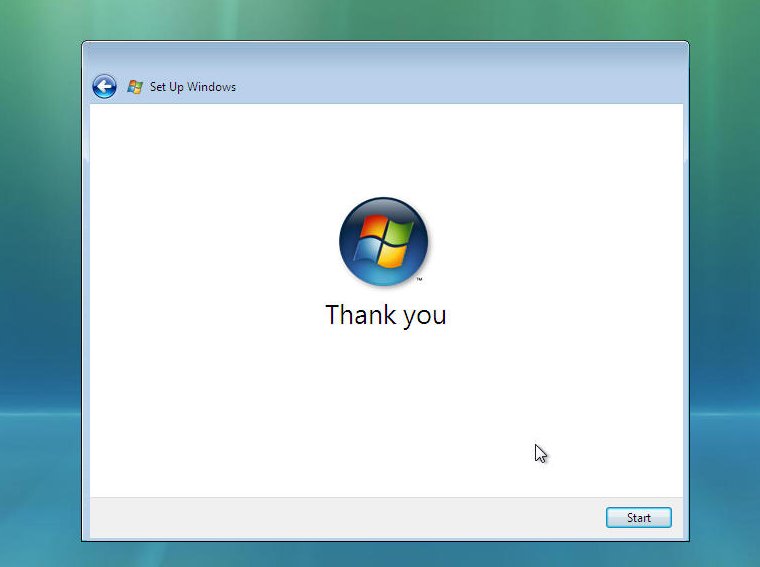
and begin to load.

and load….Cara Menginstal Windows Vista (Lengkap Dengan Gambar)

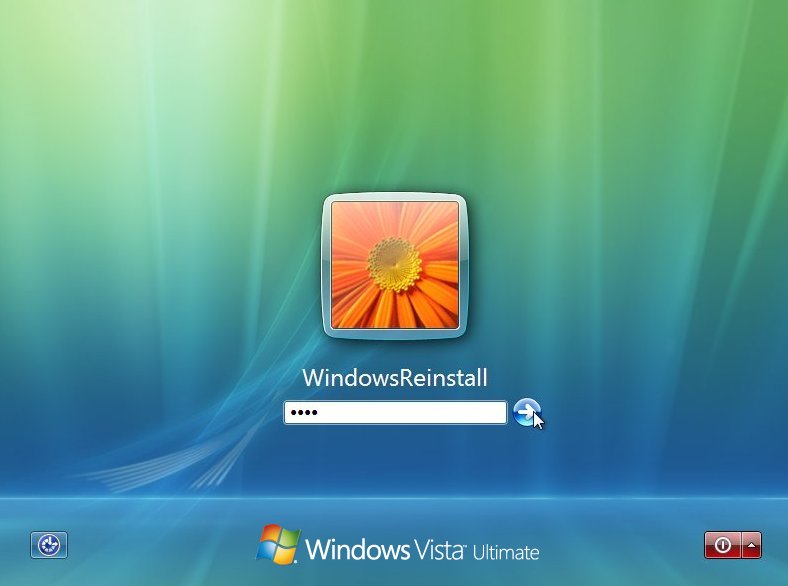
Now the Windows “LOGIN” screen. Type in your password and click on the arrow (Or press “ENTER”) to continue.Cara Menginstal Windows Vista (Lengkap Dengan Gambar)
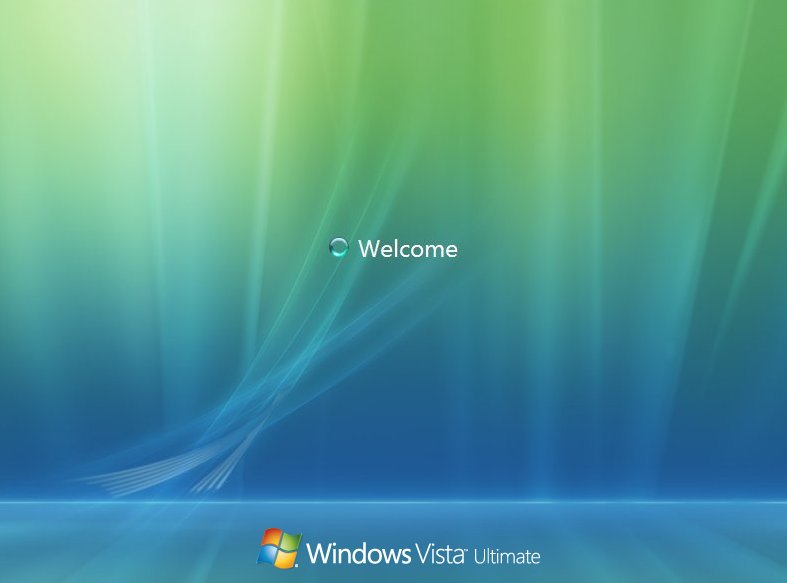
Windows “WELCOMES” you…. Cara Menginstal Windows Vista (Lengkap Dengan Gambar)
Windows now “PREPARES THE DESKTOP”
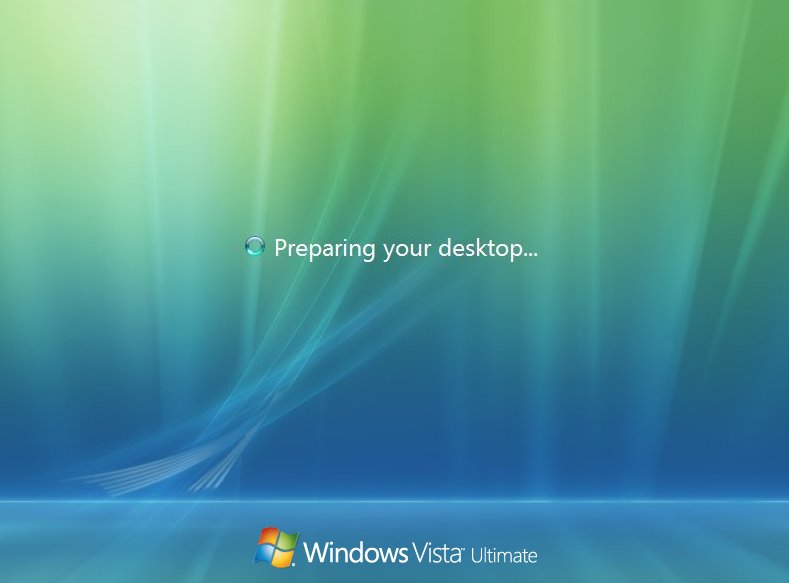
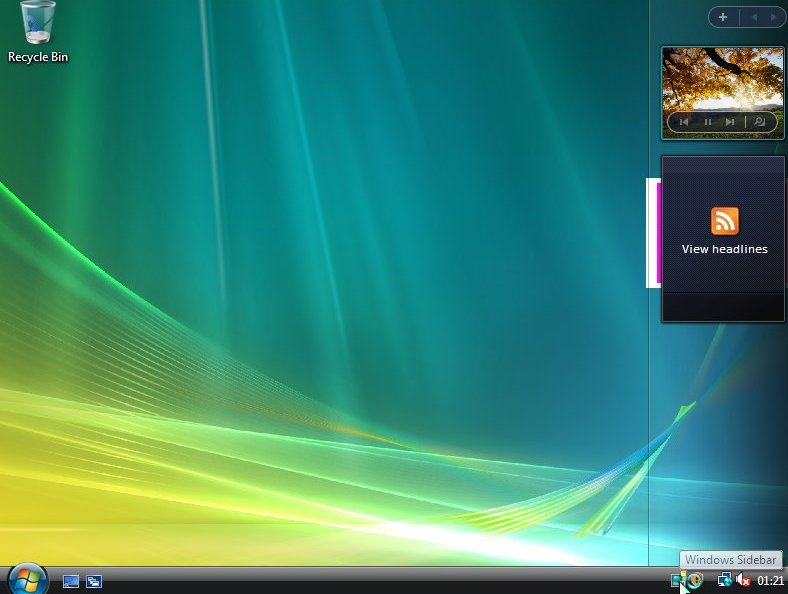
Windows desktop appears and the stages of the install begin.

Several personalised settings will be installed.
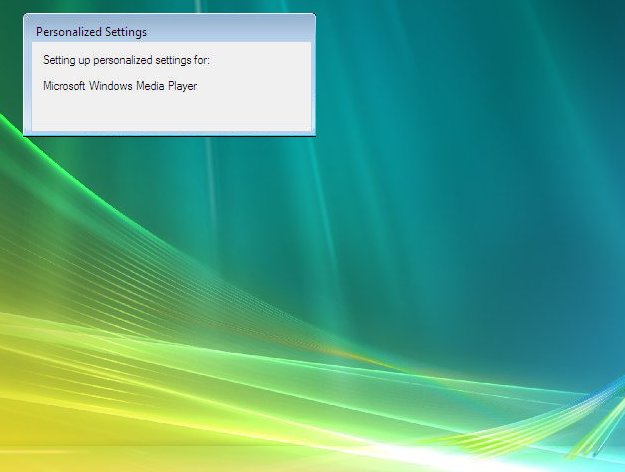
The desktop will soon appear.
Langganan:
Postingan (Atom)